카카오 간편 로그인
카카오 간편 로그인
카카오 개발자 센터 메인페이지에서시작하기 혹은 내 애플리케이션을 누르고 애플리케이션을 추가해줍니다.
추가한 애플리케이션을 들어가서 REST API 키 를 프로젝트 내에 잘 저장해둡니다.
다음으로,
앱 설정 => Web 플랫폼 등록 => 사이트 도메인 입력팁
사이트 도메인에 다음과 같이 넣어줍니다.
http://localhost:port # 테스트서버
https://...  # 실제 도메인
입력했으면 바로 밑에 등록하러 가기 를 눌러 Redirect_URI 를 등록하는 곳으로 이동하거나, 왼쪽 사이드바에서 제품 설정 => 카카오 로그인 을 눌러 이동합니다.
여기서 활성화 설정 상태를 On으로 바꾸어줍니다. OpenID Connect 활성화 설정은 자유입니다.
그리고 Redirect URI도 플랫폼 등록을 했던 것 처럼 테스트서버 혹은 실제 도메인 서버를 입력해줍니다.
다음으로 SDK 다운로드 페이지로 가서 Full SDK 를 복사해 프로젝트 index.html에 붙여넣기 해줍니다.
정보
로그인 버튼을 넣어줄 곳에 다음과 같이 작성해줍니다.
<template>
  <a :href="link"> 카카오 로그인 </a>
  <!--  -->
  <q-btn label="카카오 로그인" :href="link" />
</template>

<script setup>
const link = `https://kauth.kakao.com/oauth/authorize?client_id=${process.env.KAKAO_REST_KEY}&redirect_uri=${process.env.REDIRECT}&response_type=code`;
</script>
카카오 로그인 을 누르면 다음과 같이 나오게 되고, 동의하고 계속하기를 하면 설정해둔 redirect uri로 이동하게 됩니다.
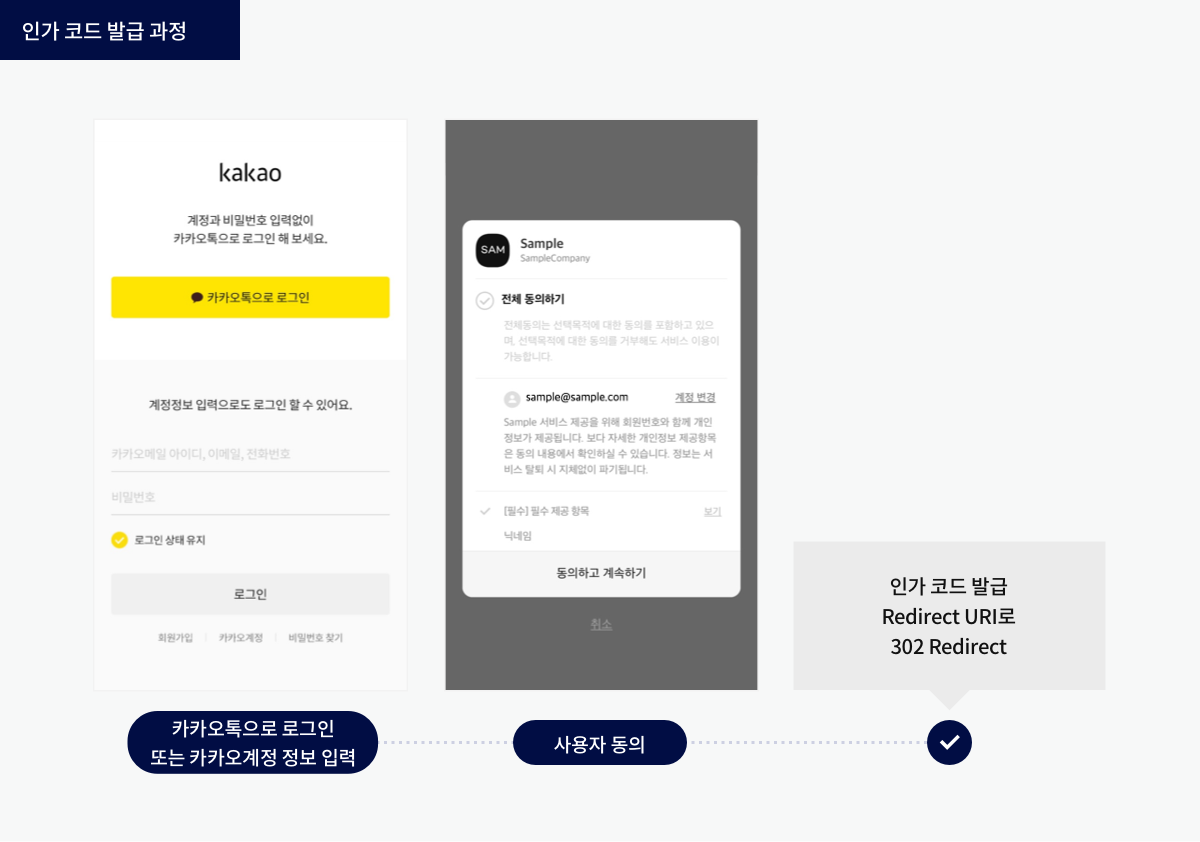
정보
이때 인가코드가 uri parameter code 로 넘어오게 됩니다. 이 인가코드를 다시 kakao API에 전송하여 access_token 을 받아와야합니다.
// App.vue
<script setup>
import { onBeforeMount } from "vue";
import axios from "axios";

onBeforeMount(async () => {
  const kakaoRequest = axios.create();

  const kakaoCode = new URL(location.href).searchParams.get("code");
  if (kakaoCode) {
    try {
      const res = await kakaoRequest.post(
        `https://kauth.kakao.com/oauth/token?grant_type=authorization_code&client_id=${process.env.KAKAO_REST_KEY}&redirect_uri=${process.env.REDIRECT}&code=${kakaoCode}`
      );
    } catch (ex) {
      console.error(ex);
    }
  }
});
</script>HTTP/1.1 200 OK Example
{
"token_type": "bearer",
"access_token": "${ACCESS_TOKEN}",
"id_token": "${ID_TOKEN}",
"expires_in": 7199,
"refresh_token": "${REFRESH_TOKEN}",
"refresh_token_expires_in": 86399,
"scope": "profile_image openid profile_nickname"
}다음과 같이 오는것을 확인했으면, 바로 access_token 으로 정보를 확인하겠습니다.
// App.vue
<script setup>
import { onBeforeMount } from "vue";
import axios from "axios";

onBeforeMount(async () => {
  const kakaoRequest = axios.create();

  const kakaoCode = new URL(location.href).searchParams.get("code");
  if (kakaoCode) {
    try {
      const res = await kakaoRequest.post(
        `https://kauth.kakao.com/oauth/token?grant_type=authorization_code&client_id=${process.env.KAKAO_REST_KEY}&redirect_uri=${process.env.REDIRECT}&code=${kakaoCode}`
      );

      const info = await kakaoRequest.get(
        "https://kapi.kakao.com/v1/user/access_token_info",
        {
          headers: { Authorization: `Bearer ${res.data.access_token}` },
        }
      );
    }
  }
});
</script>HTTP/1.1 200 OK Example
{
"id":123456789,
"expires_in": 7199,
"app_id":1234
}이제 id 를 서버에 저장을 하여 최초에는 회원가입 로직을, 이후에는 로그인을 시켜주면 되겠습니다.
팁
Quasar의 경우 quasar.config 파일에서 다음과 같이 env를 쉽게 관리할 수 있습니다.
build: {
  env: {
    KAKAO_REST_KEY: '',
    REDIRECT: '',
  }
}
카카오 로그인 ver2 부터는 보안 문제로 팝업형태는 없어졌습니다.
디자인 가이드 를 참고하여 UI/UX를 만들기 바랍니다.
자세한 문서는 카카오 개발자 센터 에서 확인하기 바랍니다.